
Autumn has arrived in Northern California! The days are warm, but the nights are cool and lovely. Trees are sprinkling leaf confetti. Roasting meats and vegetables is inviting again and there are no worries if the oven heats up the house. And acorn squash is in season! Roasted acorn squash always makes me feel like I’m launching the Fall season for my family. Cozy cozy!
Hello Old Friend
Roasted acorn squash is incredibly simple, yet yields delicious, complex, nutty and mild flavors. Brown sugar, pure maple syrup and butter contribute to caramelization and a toasty, roasty taste. This is a very popular dish on many fall and winter holiday tables.
But How Do I Choose a Good One?
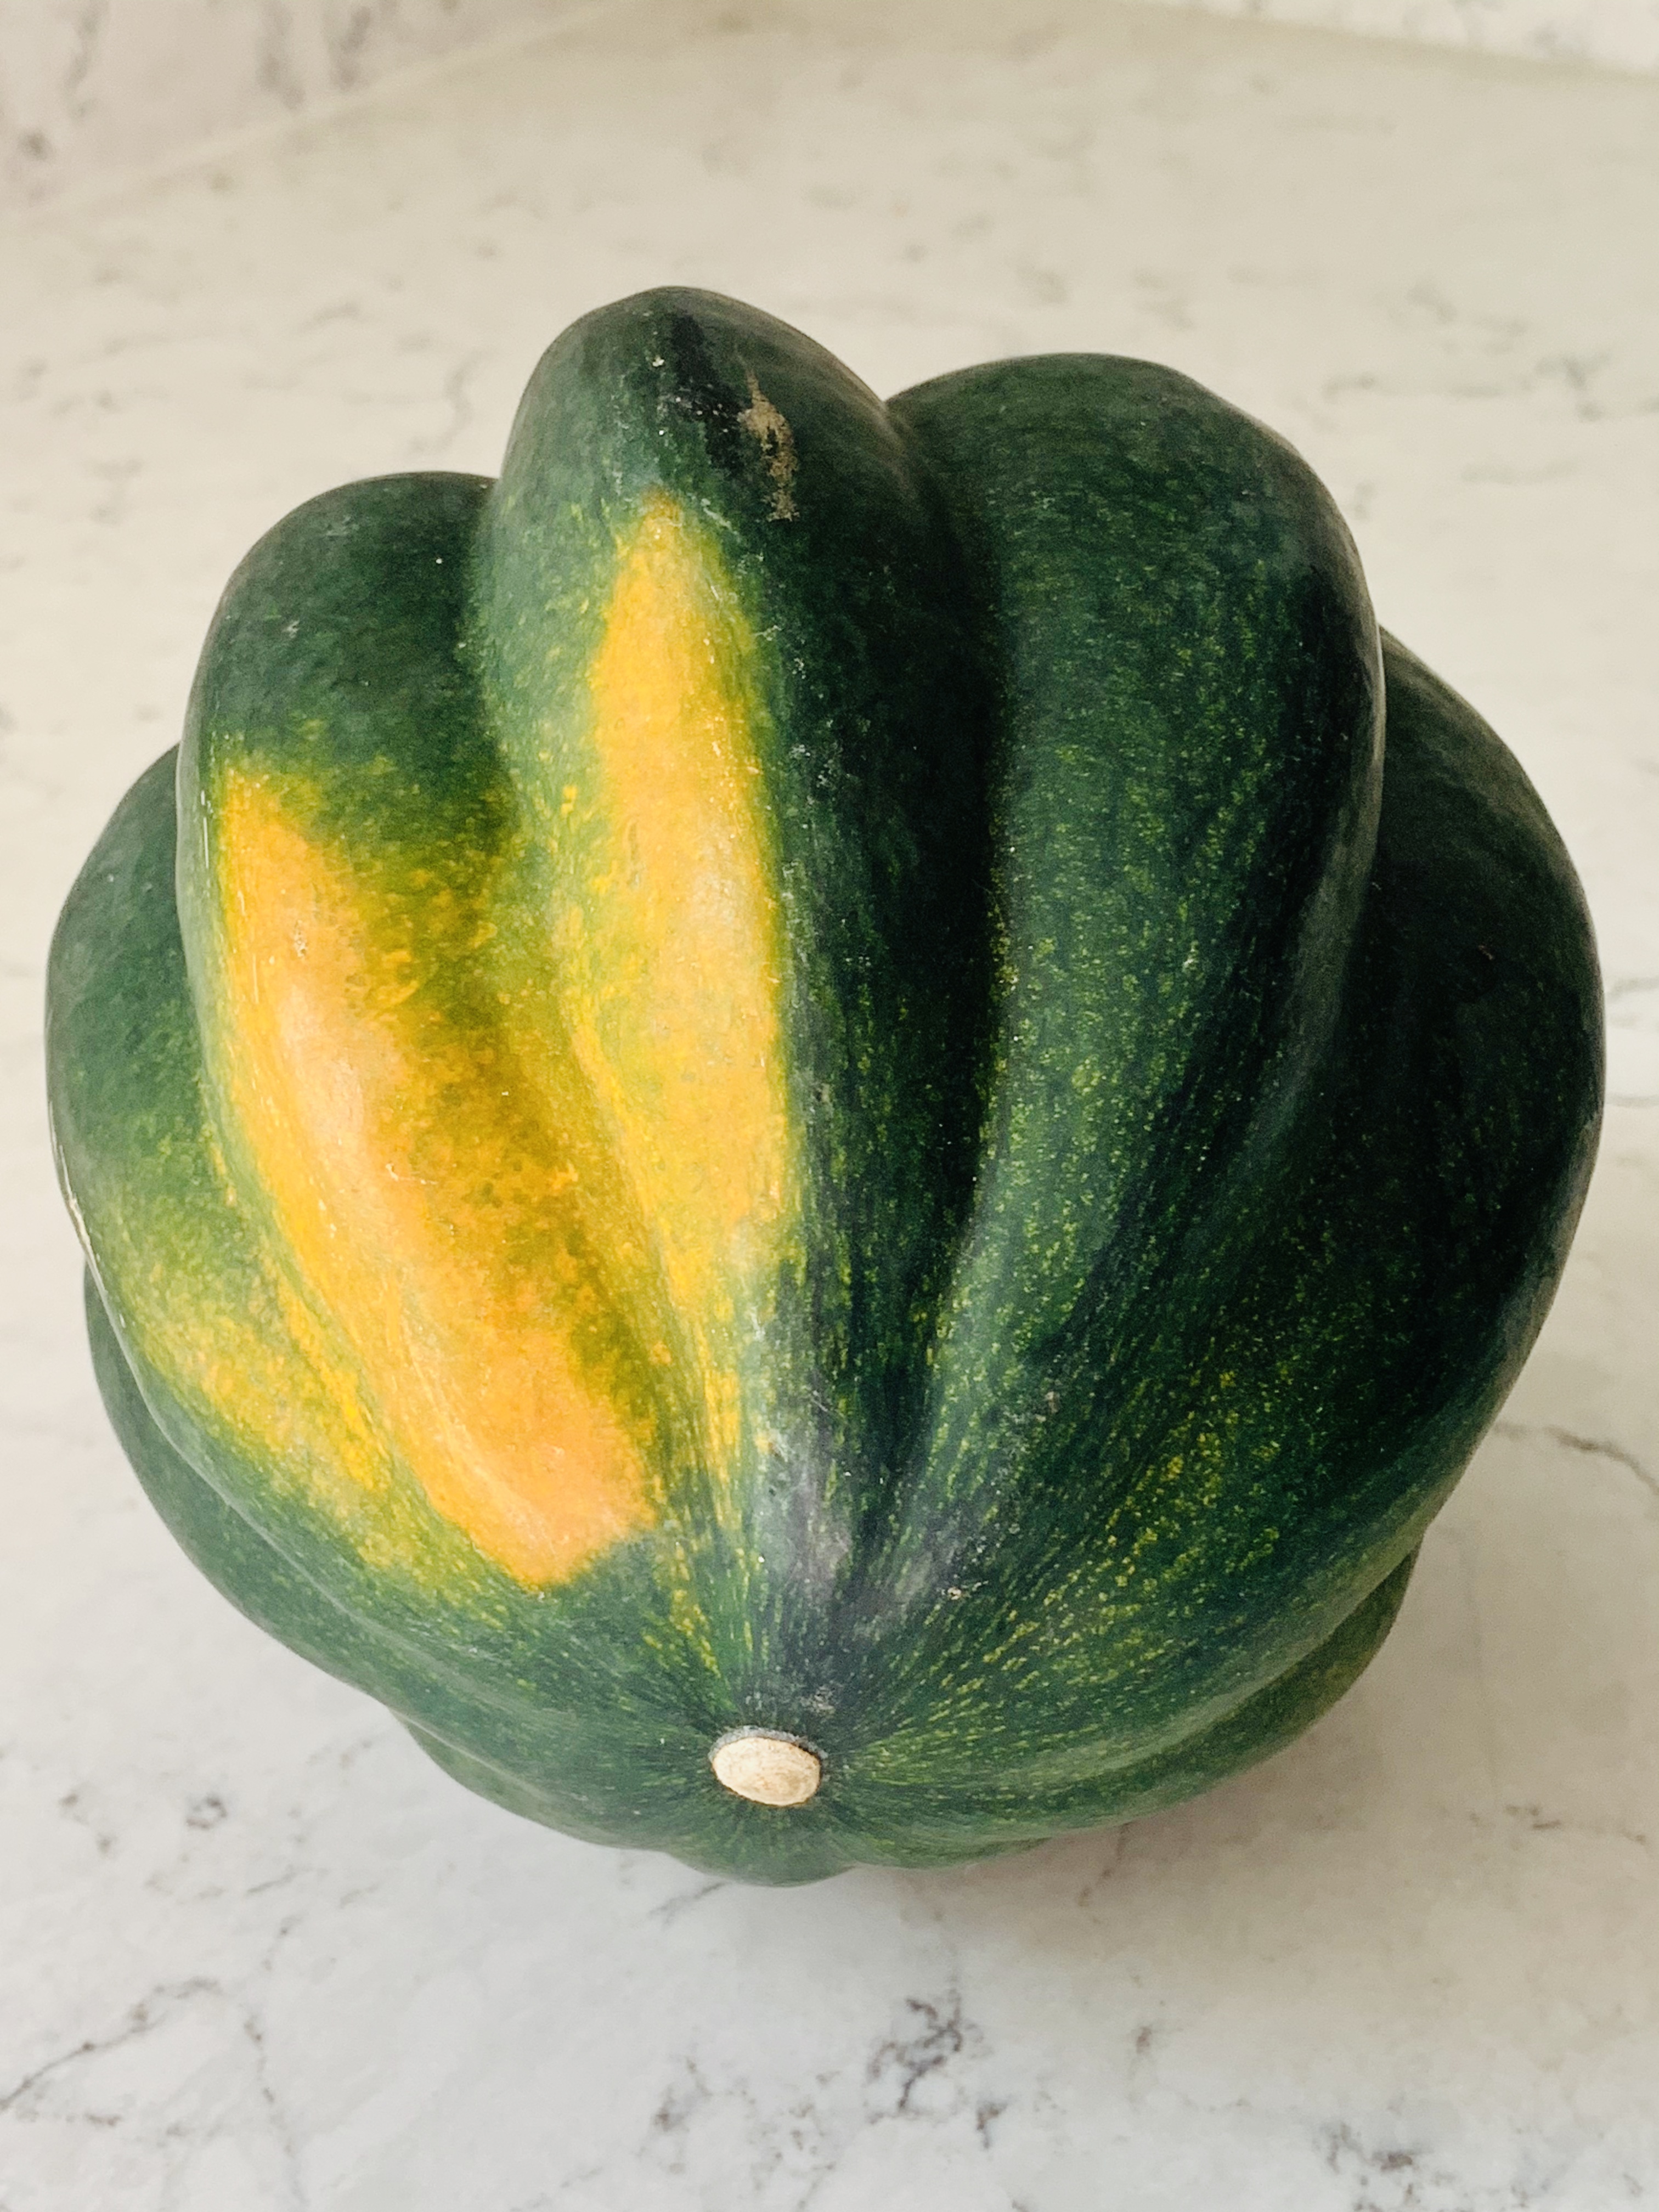
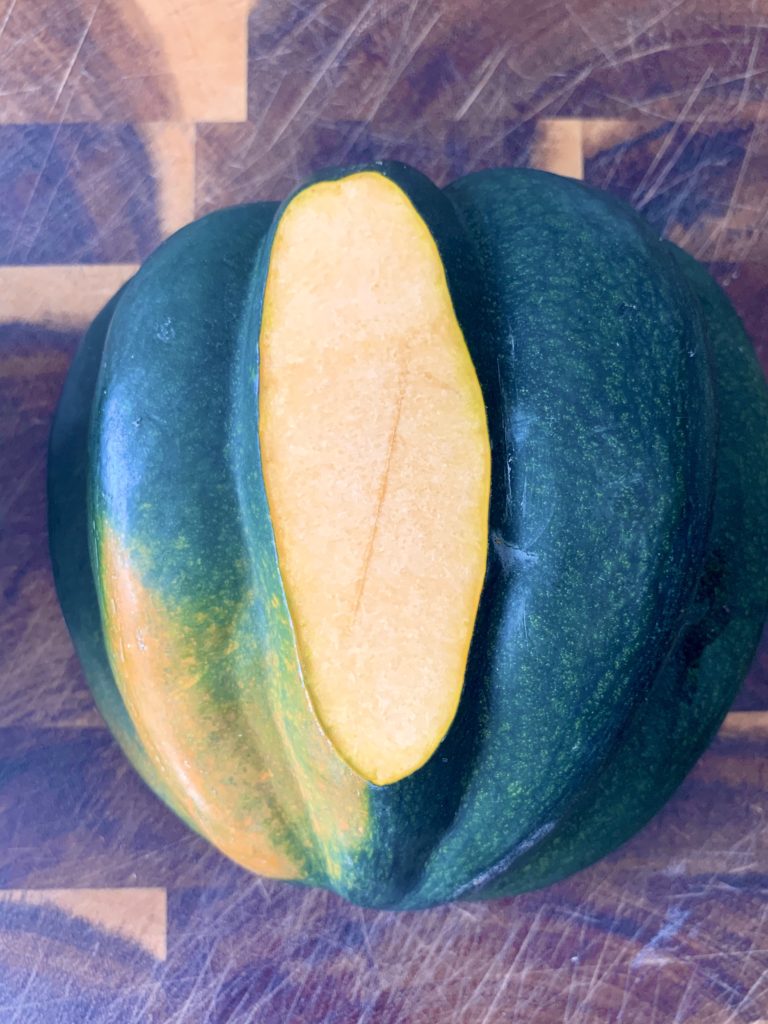
Choose squash that has dull skin, is mostly green, and heavy for its size. The squash in this photo sat in a basket in my kitchen for about a week. The yellow/orange spot is a sign that the squash was further ripening, and almost past its prime. But as long as there are no mushy spots, it’s still good!

Simple Ingredients – Big Taste
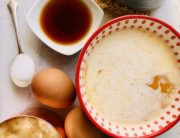
Four ingredients, a good knife and an oven are all you need. Pure maple syrup, not the sticky, viscous stuff my kids like with “Aunt” or “Mrs” on the label, but the pure stuff from Canada (er Costco) create magic here. Add in brown sugar, butter and a pinch of salt and that’s it.

The Hardest Part
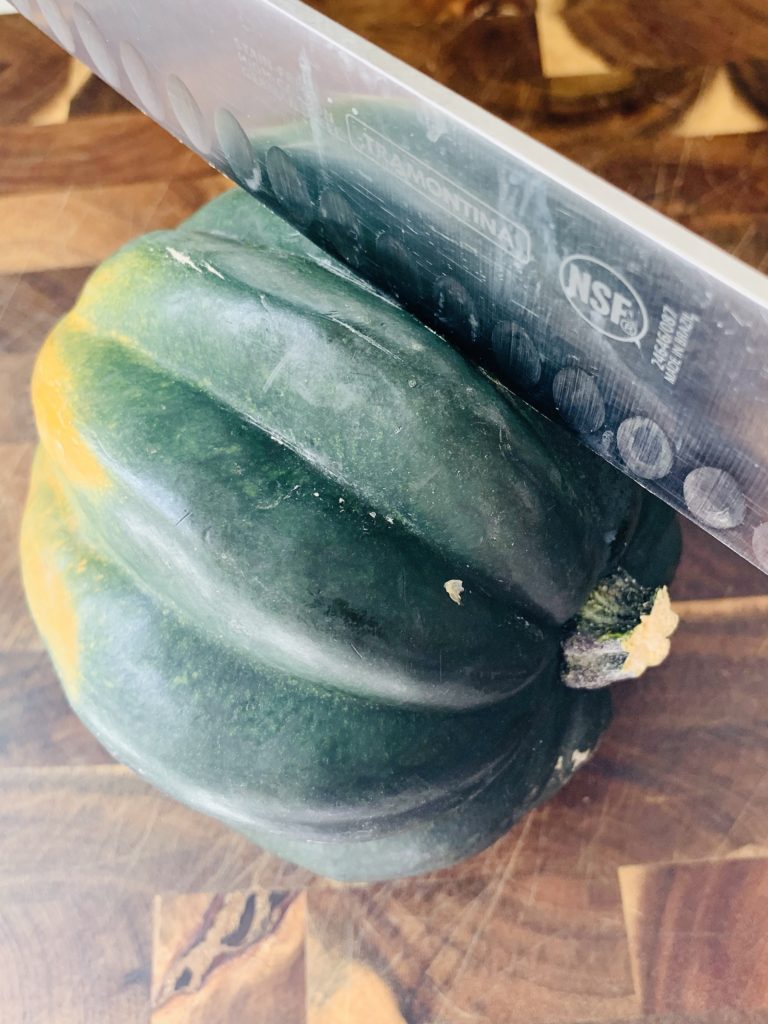
The hardest part of baking an acorn squash is cutting it. Be super careful with this step! Make sure to always keep the fingertips of your non-knife hand tucked in, almost like you are trying to pierce the squash with your fingernails. And make sure you are using your sharpest knife.
Acorn squash has thick, tough skin. It’s also roly-poly on your cutting board. Some people like to pierce the skin with a fork and microwave their squash for a minute or two to soften before cutting. But I prefer not to microwave beforehand.
Instead, I roll the squash around to find the most stable section. Using the tip of my knife, I pierce the skin just a bit in the valley of one of the ridges. This creates a groove for me to then saw the knife through. Occasionally, the knife becomes stuck part-way. This is where I resist the temptation to pretend like I’m a Fruit Ninja (anyone remember the Fruit Ninja game??) It would be so easy to lift the knife with the partially cut acorn squash still attached and whack it down on the cutting board while applying pressure. But that’s ……… tempting but dangerous! Instead, when my knife becomes stuck, I pull it out and reinsert it, rocking the blade while pressing down. And viola’! Two halves where there once was one! Again though – keep your fingers out of the way!!!
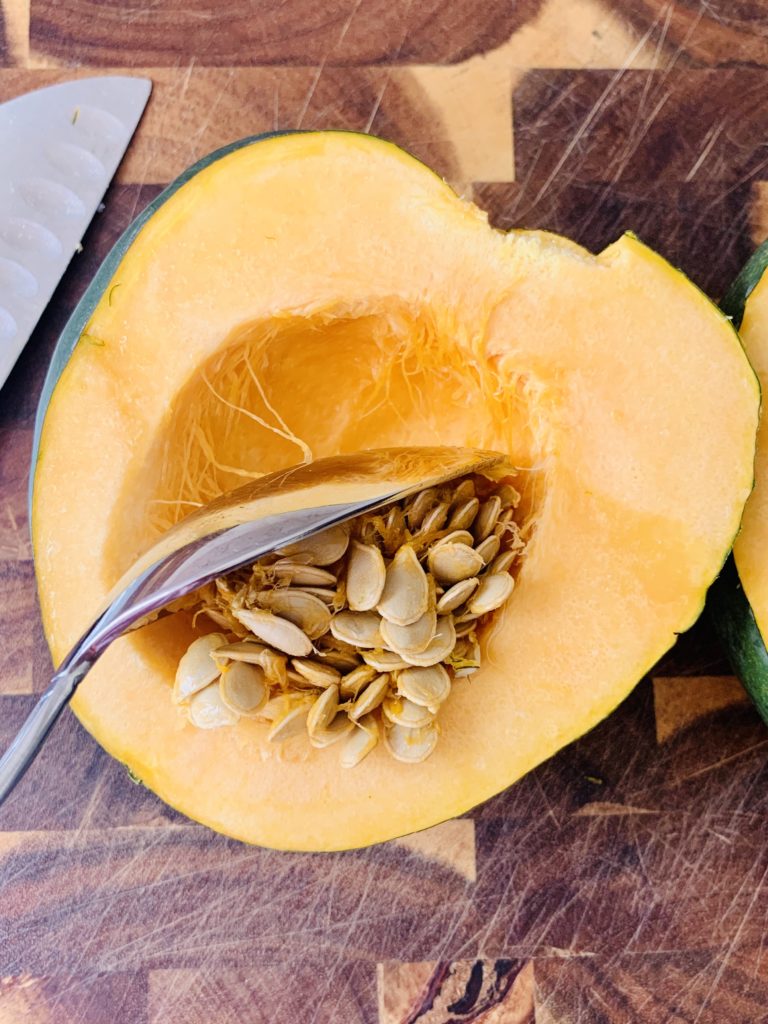
Nature’s Packaging
Beautiful seeds all nestled snug in their beds. But out they must go! Consider saving a few for next season’s vegetable garden though.

I use a large serving spoon to scrape them away.
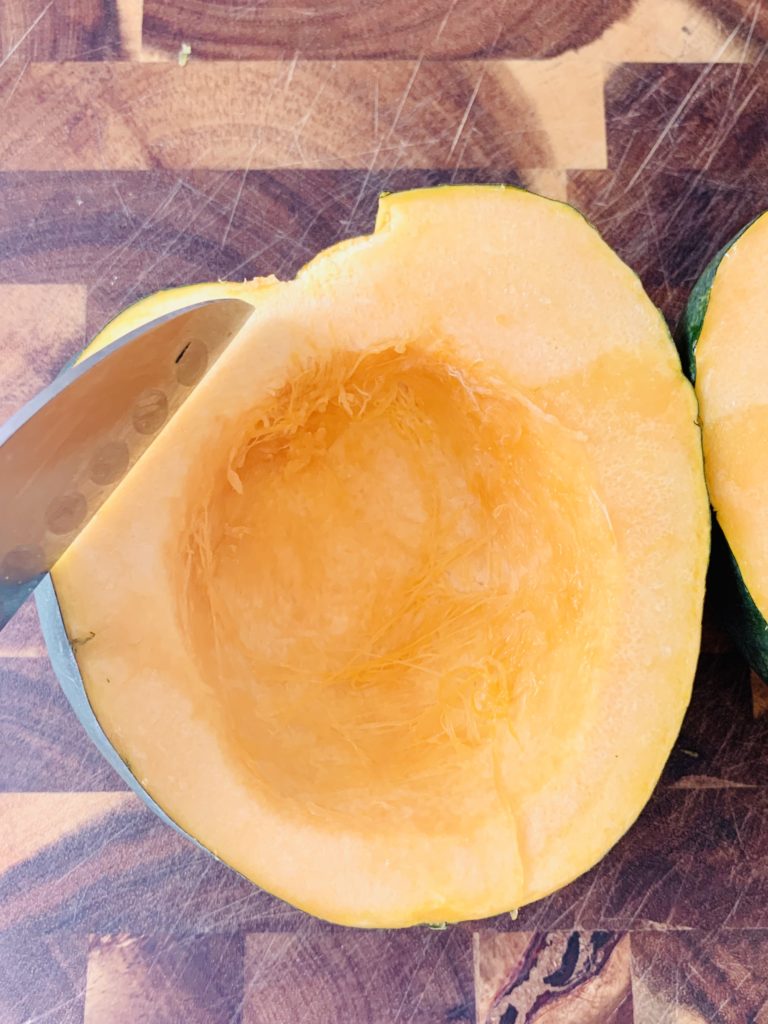
Use a knife to score a crosshatch pattern into the squash’s flesh. You can see here that there are a few remaining fibers that didn’t get scraped completely out, which is ok. They disappear during roasting.
Learn From Your (My) Mistakes
I like to cut off one of the ridges to stabilize the acorn squash if I have a particularly tippy half. This prevents the ingredients from spilling over if the squash tips while it’s roasting in the oven. However, in this case (see pic below) I cut off too much. Because I cut too much, the butter/sugar/maple syrup mixture seeped out of the bottom during roasting. I didn’t realize this mistake at the time. But the good news? This is a very forgiving recipe and nothing was ruined! I’ll explain further below.
Now For The Yummy
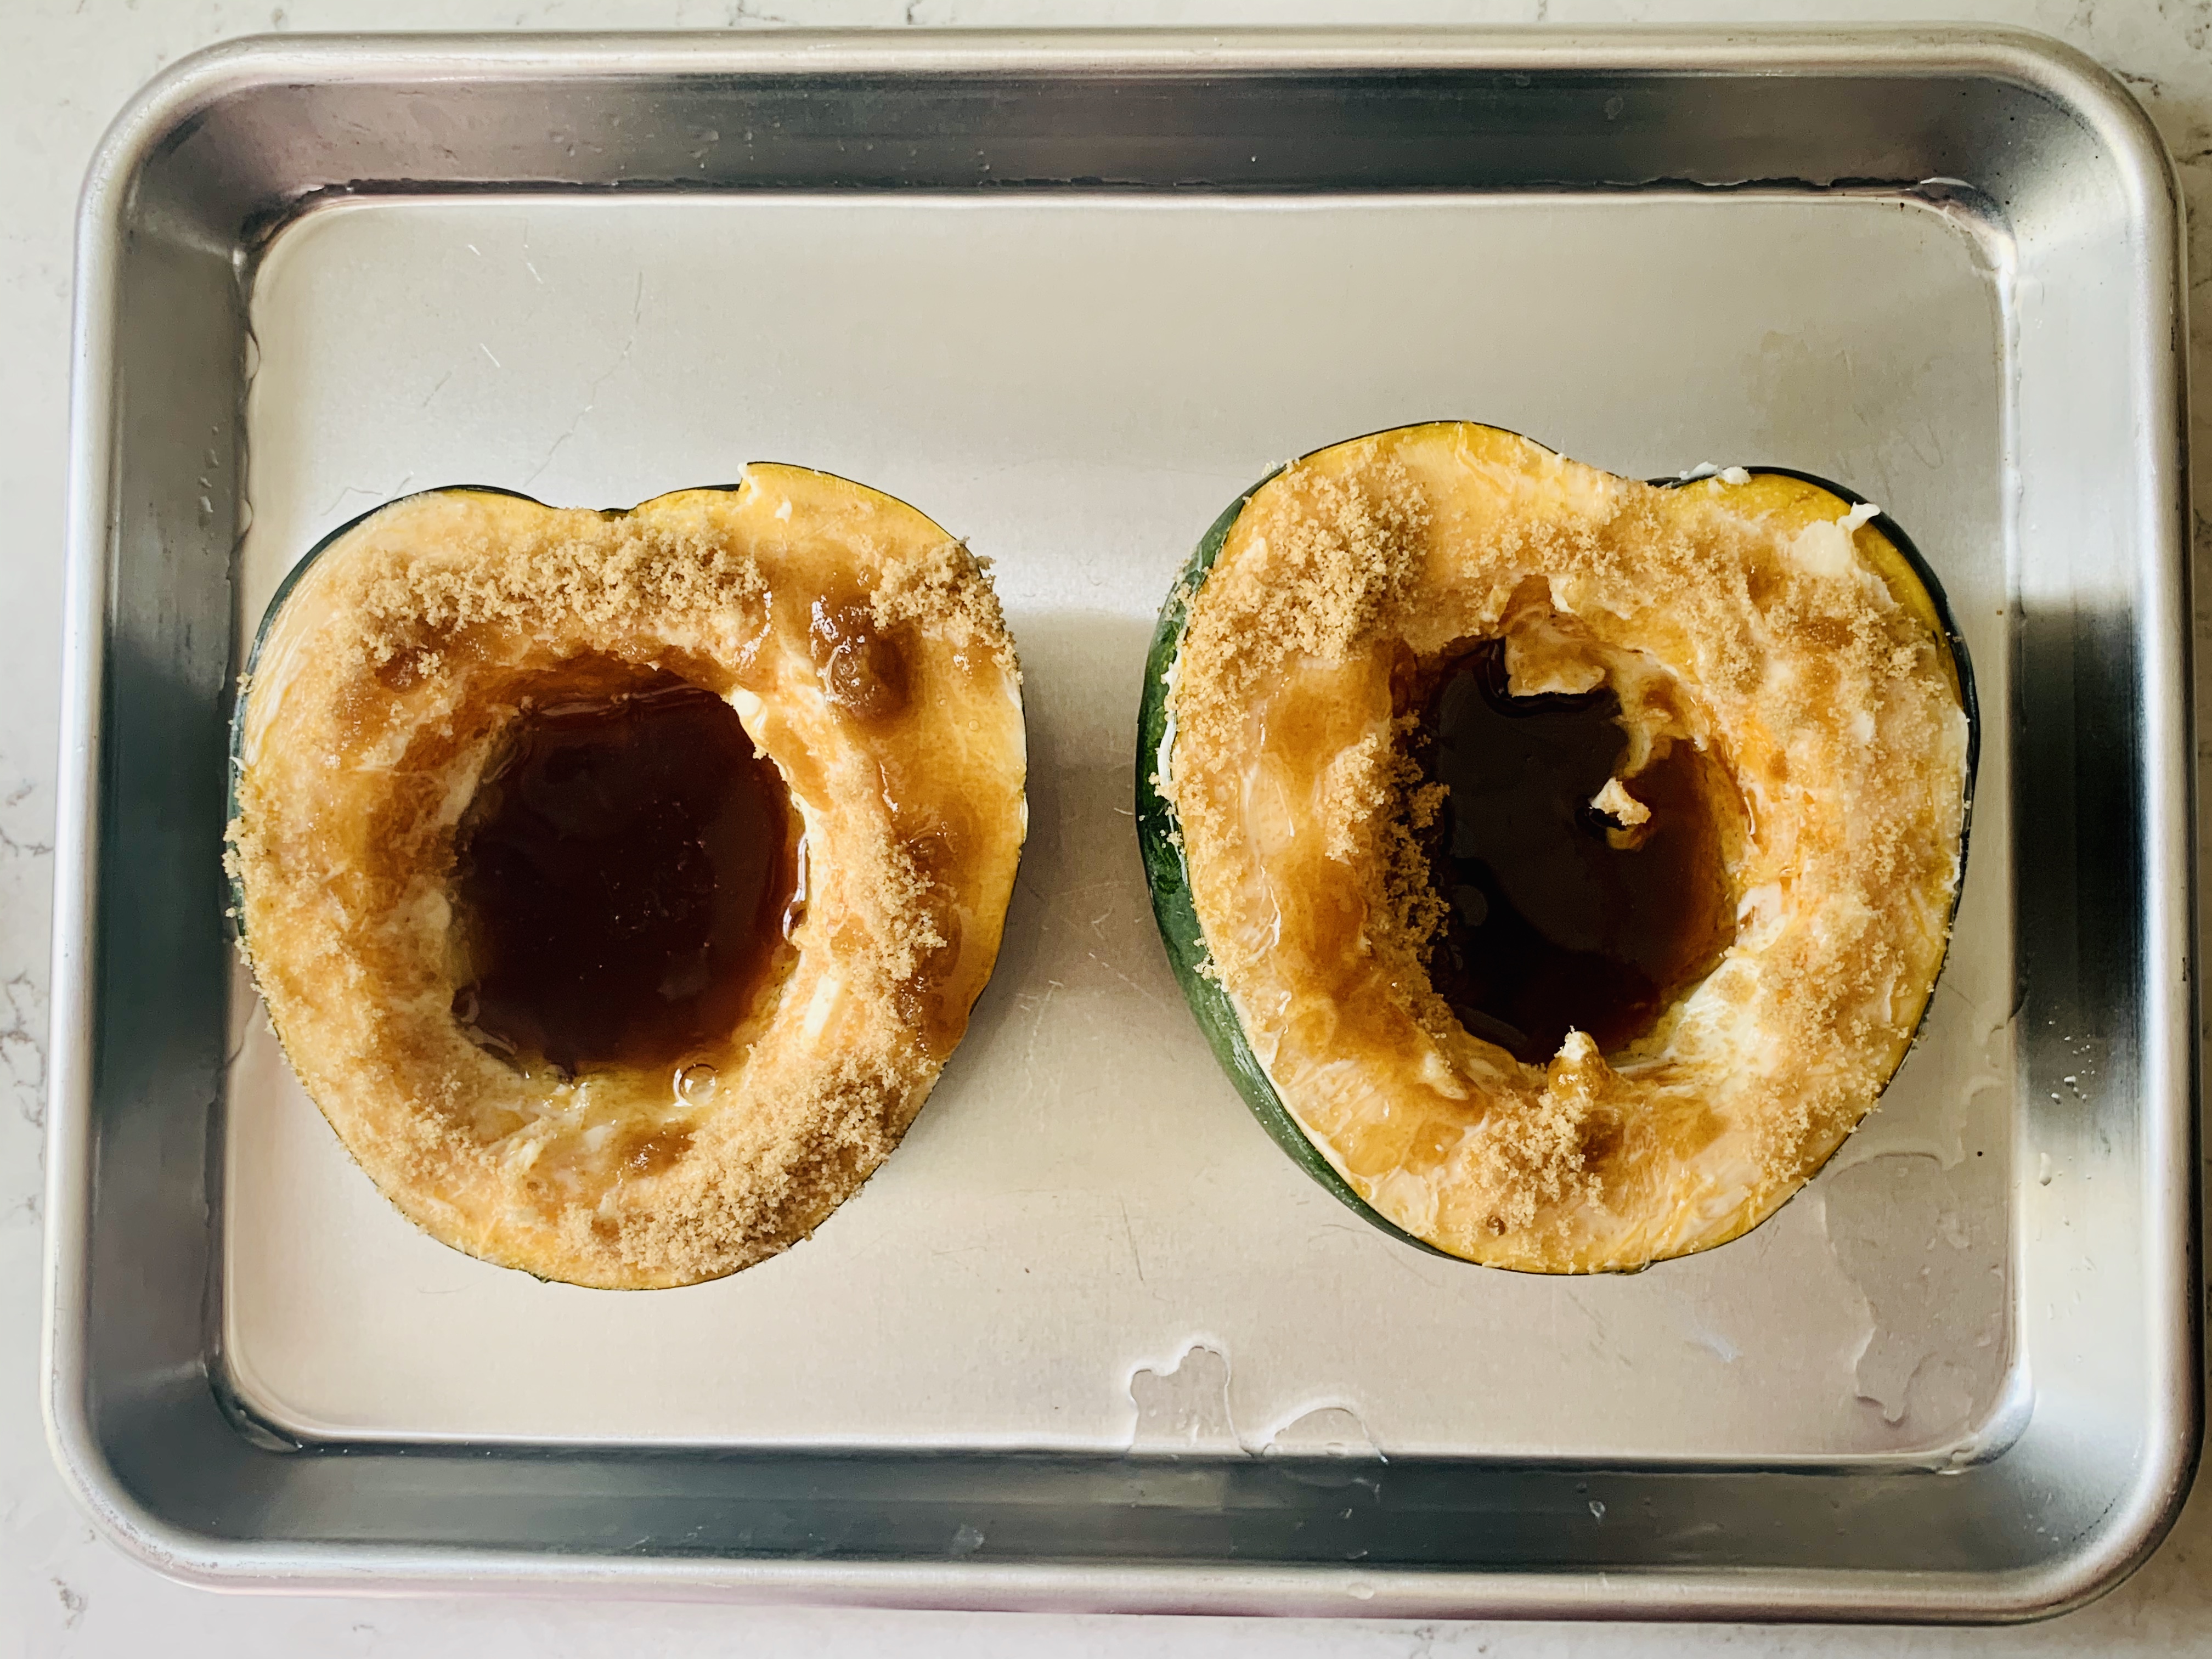
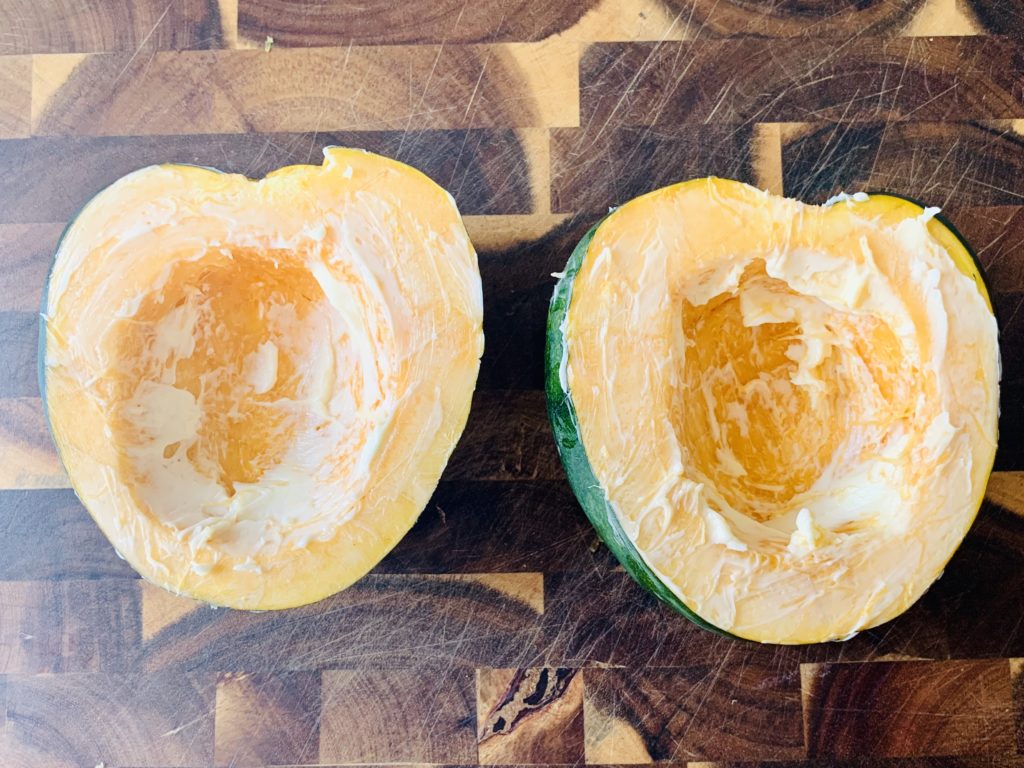
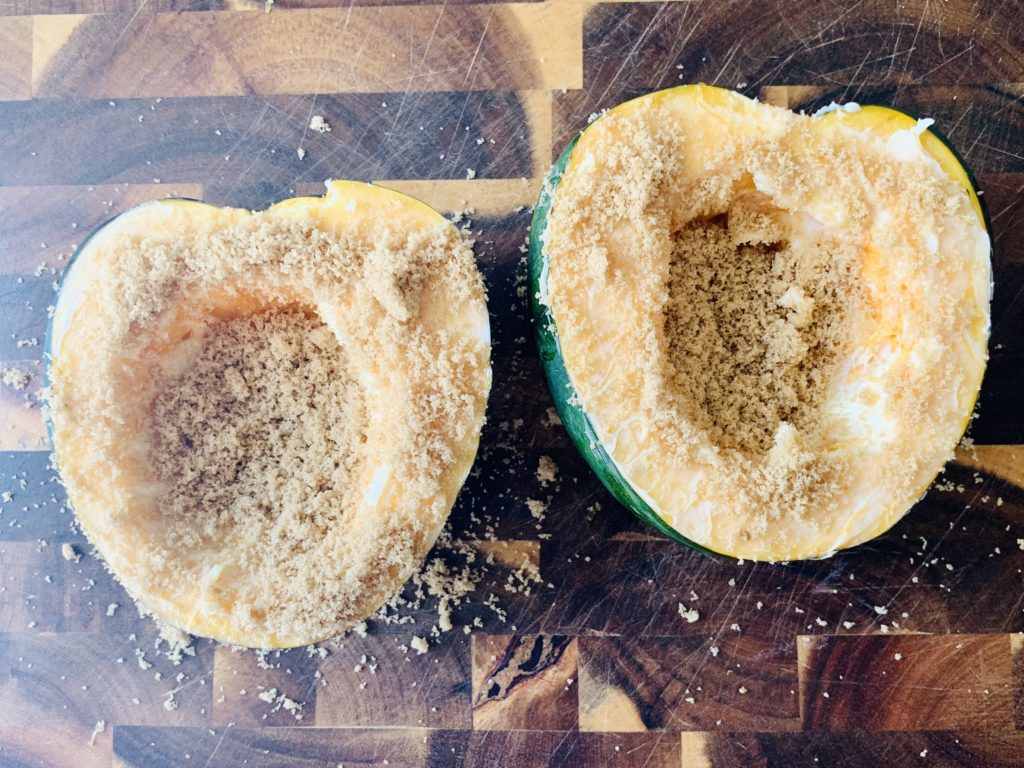
Smear the acorn squash with softened butter. Best tool I’ve found for this? Fingers!
Two tablespoons of brown sugar is plenty for one roasted acorn squash.
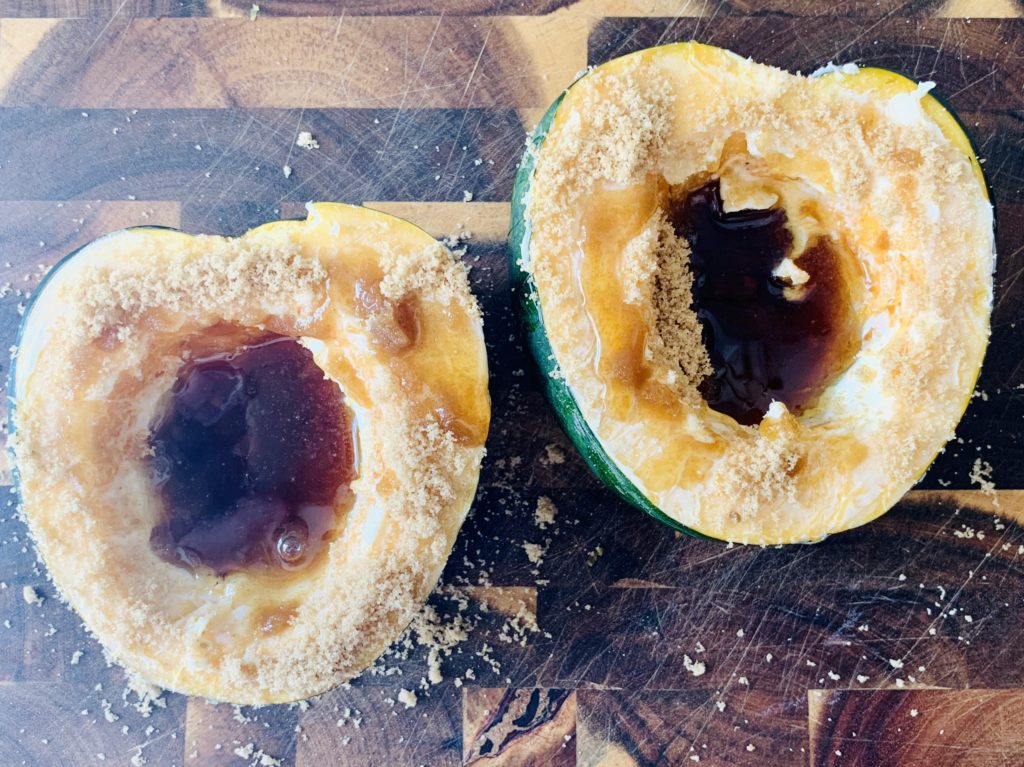
And just 2 teaspoons of pure maple syrup goes a long way. Don’t forget to sprinkle a pinch of salt to balance the sweet and the butter.
Saving Grace
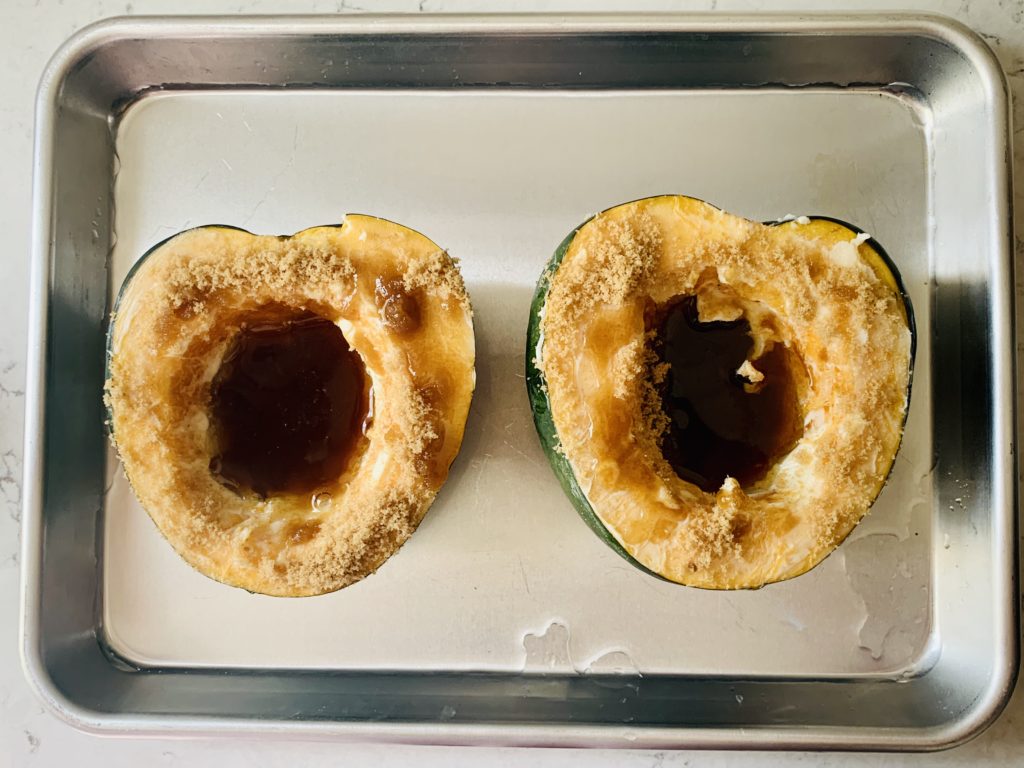
This is where the recipe is forgiving of mistakes. Place the prepared squash halves in the pan and then add 1/2 to 1 cup of water to the pan’s surface. Our basic ovens are dry inside. By adding water to the pan, it helps create moisture and steam which enhances the roasting of these beauties.
Do you remember the mistake I showed earlier? (But for one sec, can I just point out how nice and level these squash halves are??) Because there was water in the pan, when the butter/brown sugar/maple syrup seeped out, I didn’t end up with a burnt mess and a ruined cookie sheet. Instead I got butter/brown sugar/maple syrup diluted with water. It was as if I had created acorn squash gravy! I checked on these squash partway through cooking and saw what was happening. Then I was able to baste the leaky squash with the pan drippings. It turned out to be very tasty!
This is a case of turning a mistake into a positive. Even still, don’t cut off as much of ridge like I did so you can avoid the mistake in the first place!
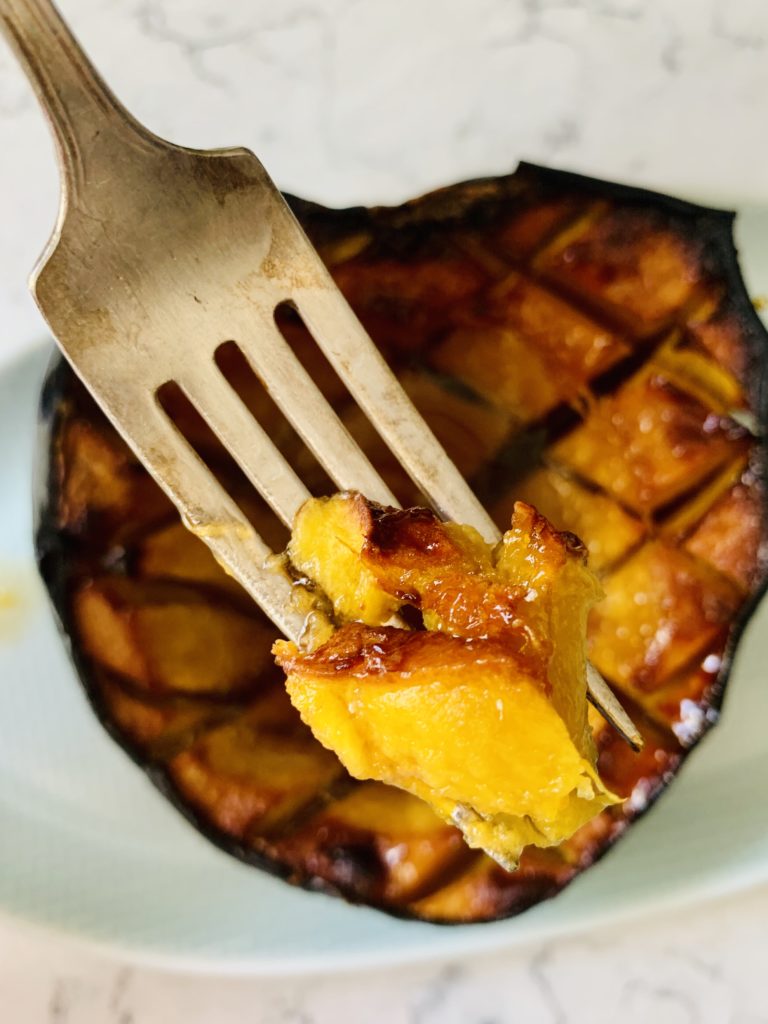
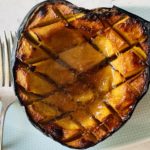
Caramelization Sensation
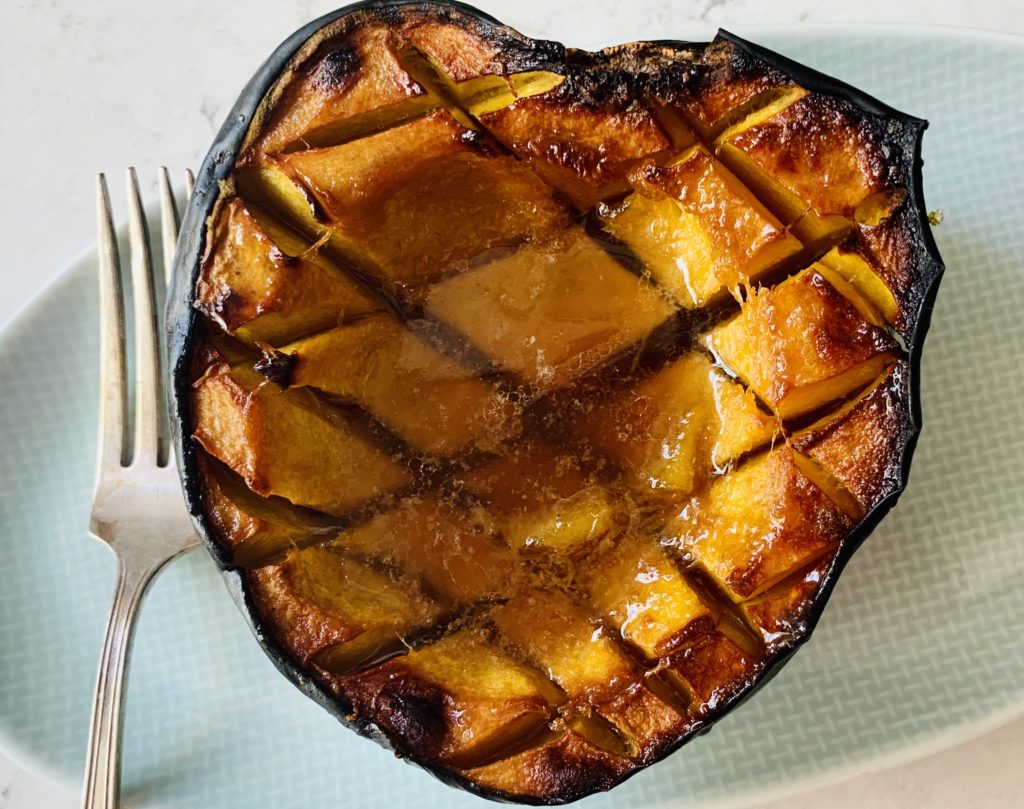
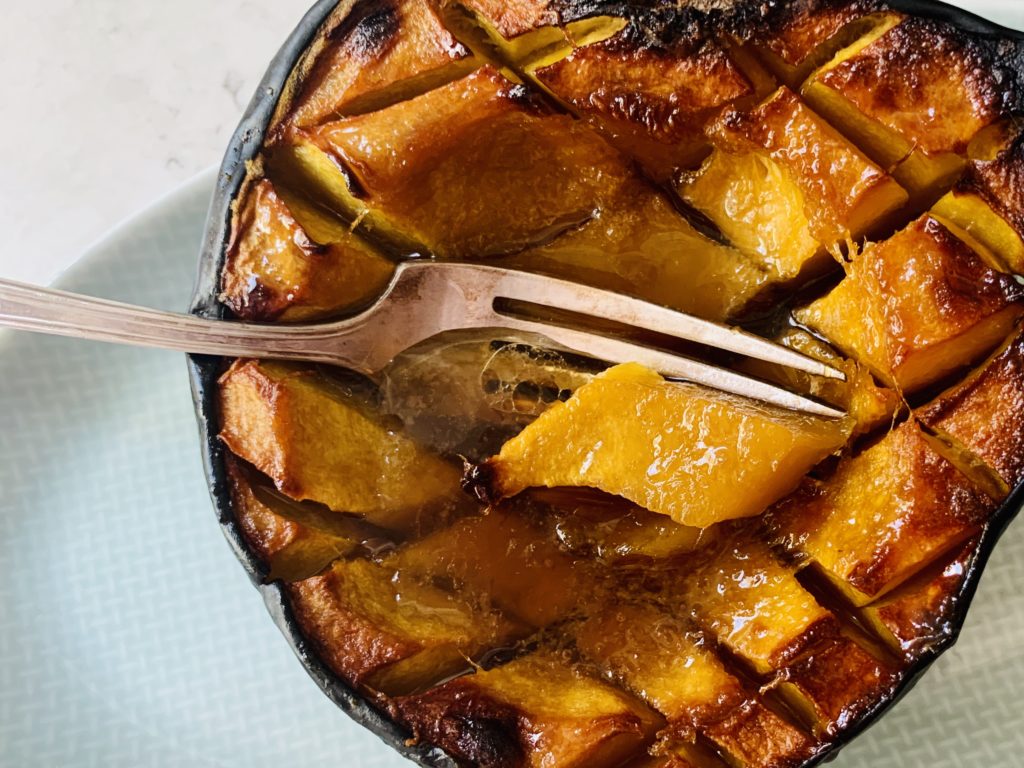
At first glance, you might think this acorn squash is burnt. Yes, the dark green skin cooks to a shade of black. But it doesn’t matter because the skin isn’t the part that we eat! For my tastebuds, this is a perfectly roasted acorn squash. If however you prefer less color on your squash, reduce the roasting time to around 60 minutes. I cooked this squash for 75 minutes.
Roasted Scorn Squash
Acorn squash roasted with butter, brown sugar and pure maple syrup. Delicious and easy to prepare, this simple recipe is a welcome addition to a holiday table or a weeknight dinner.
Ingredients
- 1 acorn squash
- 1 tbsp butter, softened
- 2 tbsp brown sugar
- 2 tsp pure maple syrup
- dash salt
Instructions
-
Preheat oven to 400°F.
-
Carefully cut the squash in half from stem to tip. Use a large spoon to scrape out the seeds and stringy fibers. Using the tip of your knife, score the flesh into diamonds, approximately 1 to 2 inches across. Place the squash halves on a cookie sheet, cut sides up.
-
Spread butter over all of the yellow squash flesh.
-
Sprinkle the brown sugar over the buttered areas.
-
Drizzle maple syrup over the brown sugar, allowing the extra syrup to pool in the seed cavity.
-
Sprinkle salt over both halves.
-
Add 1/2 to 1 cup of water to the cookie sheet.
-
Bake for 1 hour and 15 minutes or more, until the flesh is soft, golden and caramelized. After removing from the oven, use a spoon to collect the liquified butter, sugar and maple syrup and baste the squash before serving .


Awesome post! Keep up the great work! 🙂